Most people buy a flat top, set it on the nearest table, and then spend a month fighting it. A portable griddle setup is not one purchase. It is a heat source, a cooking surface, a level place to put it, and a grease plan, in that order. Get that order wrong and you will blame the steel for a problem that started with a wobbly table and a burner that only lights on the left side.
I spent 13 years on the line, eight of them on a four-foot flat top that turned out 400 breakfasts before the lunch rush. Now I run a food trailer and a backyard griddle that gets used three nights a week minimum. The griddles that actually get cooked on are almost never the most expensive ones. They are the ones set up so the cook never has to think about the equipment.
So this is not a shopping list. It is an order of operations for building a setup you will still be using in year three, whether it lives on a campsite picnic table or on your patio.
Why you should trust me
I have seasoned more flat tops than I can count, from a four-foot commercial unit down to a 22-inch camp griddle, and I have watched what neglect does to all of them. Steel is steel. It rusts when you leave it wet, it warps when you shock it with cold water, and it turns black and glassy when you feed it thin coats of oil and heat on a regular schedule.
I also spent years on the other side of the counter, watching a grease trap fill during a Saturday rush. That is where most home setups fail first. A griddle with a bad grease plan is a griddle you stop using, because every cook ends with a puddle and a scrub.
My rule is simple: a setup has to survive a full breakfast service. Pancakes, bacon, hash browns, eggs, and a round of smash burgers back to back, with the surface wiped between batches. If it cannot do that, it is a toy.
How I picked and how I tested
Everything that ends up in one of my setups has to pass four questions before it earns a spot:
- Does the heat spread across the cooking surface, or does it pool in one hot spot?
- Does the grease management actually work when the surface is loaded with bacon?
- Will the steel hold its seasoning through a normal month of cooking?
- Would I cook a full breakfast service on it without apologizing to anyone?
That is the filter. The two pieces below are the ones that fit it for a portable build, one as the heat source and one as the surface. Everything else in this guide is the order you assemble them in and the habits that keep them working.
Notice what is not on that list. Brand names, knob count, and whatever number is printed on the box in big type. BTU count is a lie without burner layout. Two well-placed burners beat four burners of hype every time.
The two pieces this setup is built on
A portable build needs two things: heat you can control and a surface that holds it. Here is the pair I would start with.
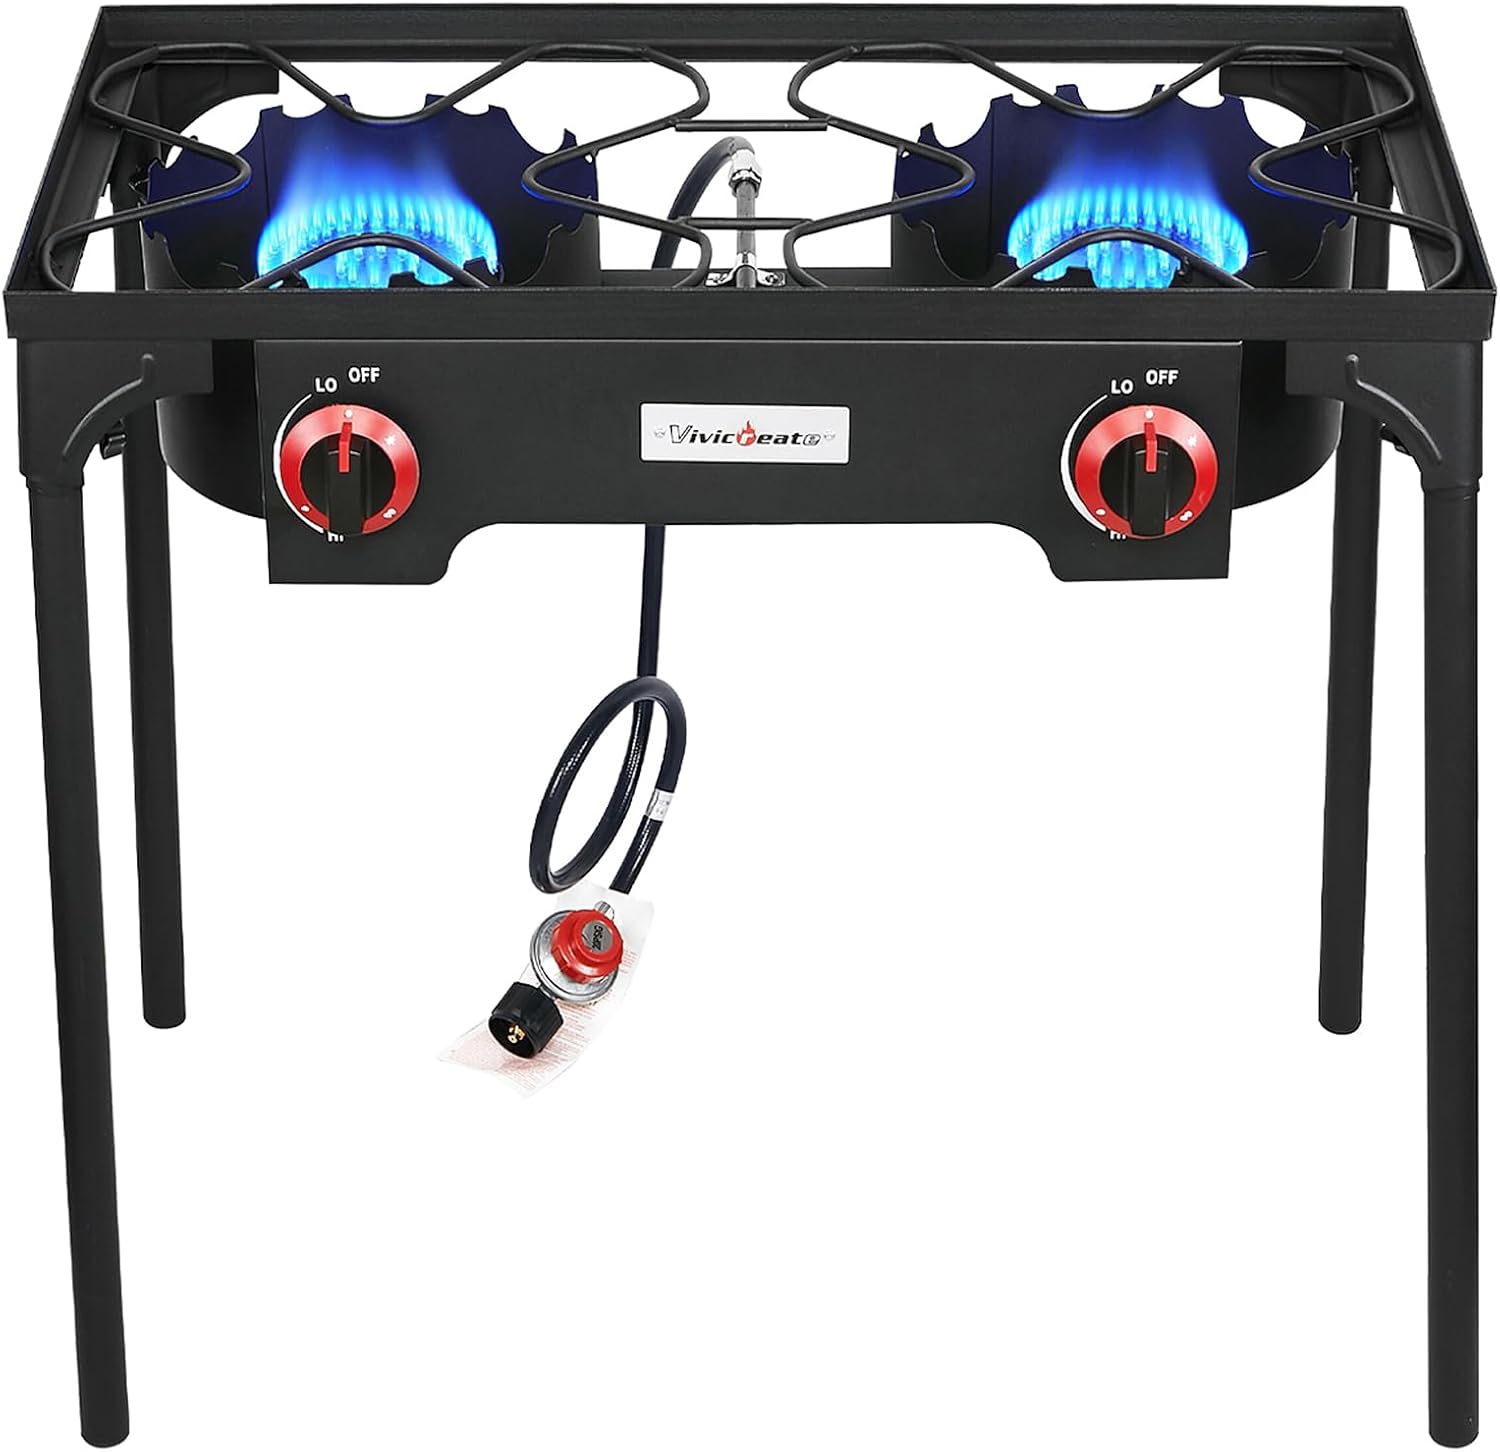
The heat source: VIVICREATE Propane Grill 2 Burner Outdoor Propane Stove Portable Gas Grill High Pressure Camping Stove Double Burner Cooker for Camping Backyard BBQ Outdoor Cooking
 Visit on Amazon →
This is the portable heat half of the equation. Two burners on a high pressure propane feed, built as a standalone stove you can move from the tailgate to the patio and back. If your griddle top does not carry its own burners, this is what sits underneath it. If it does, this is what boils the coffee, heats the beans, and keeps a pot of water going while the flat top does the real work.
The reason I like a two burner stove in a portable setup is control. Two burners means two zones, and two zones is the minimum for real cooking: one side ripping hot for searing and smash burgers, one side turned down for eggs and onions. A single burner gives you one temperature and a lot of guessing.
Flaws but not dealbreakers: Two zones is not four. If you are feeding a crowd on a 36-inch surface, you will wish you had more independent heat under the steel. Wind is also the enemy of any open propane burner, so a folding windscreen or a sheltered corner matters more than people expect.
Anyone building a camping or tailgate setup, or running a griddle top without built-in burners, should start here.
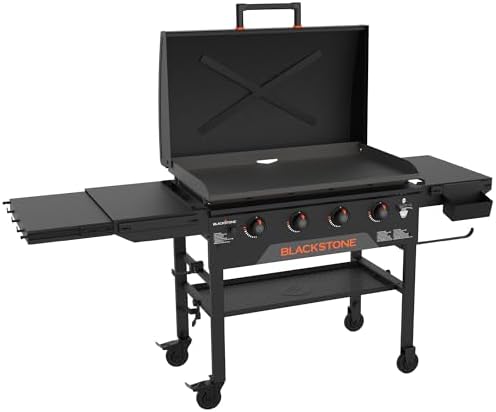
The cooking surface: Original Portable Griddle with Built-in Hood, Black, 36 Inch
 Visit on Amazon →
Thirty-six inches of flat top with its own hood and its own burners. This is the piece that turns a patio into a short-order line. The hood is the feature people underestimate. A hood gives you steam for melting cheese over a smash burger, a place to trap heat while you finish a batch of pancakes, and a wind break on a gusty afternoon, which matters more in Phoenix than anyone believes until March.
The 36-inch width is also the honest part of the decision. That much surface will hold a full breakfast for a family of four with room to spare, and it will also take longer to heat, longer to season, and more table space than you think. Measure your patio, your tailgate, or your garage before you commit.
Flaws but not dealbreakers: Big surfaces are less forgiving of a lazy seasoning routine. More steel means more area to keep oiled, and a 36-inch top stored wet in a garage will show you rust faster than a small camp griddle. If you cook for two on a Tuesday, this is more griddle than you need, and that is a real reason to size down rather than a knock on the unit.
Anyone who cooks for a crowd, hosts breakfast, or wants one surface that can run pancakes, burgers, and hibachi without a break should be looking here.
The setup, step by step
Now the part that actually decides whether you cook or fight.
Step one: Decide the footprint before you buy anything else. Count what you cook on a normal week, not what you cook on the Fourth of July. Two people eating eggs and toast do not need 36 inches. A family of five with a standing Sunday breakfast does. Buy the surface you will use on a Tuesday, then buy the heat to match it.
Step two: Level the surface. A griddle on a slope pools oil on one side and burns on the other, and no amount of technique fixes it. Set the stand or the stove on flat ground, check it with a level or a glass of water, and shim the legs if you have to. This is the step everyone skips and then complains about uneven browning.
Step three: Season before the first cook, not after. Heat the surface, wipe on a thin coat of a high smoke point oil, and let it smoke off. Repeat three to five times. Thin coats polymerize into the black, glassy layer that makes the surface nonstick. Thick coats go tacky, and tacky flakes off into your food. Seasoning is a habit, not a one-time event.
Step four: Find your zones with dry bread. Before you cook for anyone you want to impress, lay slices of cheap bread across the surface and watch where they toast fastest. That tells you where your hot spots live, and every griddle has them. Once you know the hot corner, you stop burning the first pancake.
Step five: Get the grease plan in place before the first cook. A removable trap, lined with foil if it is the kind that fills fast, plus a scrape station: a metal scraper, a squeeze bottle of oil, and a folded rag or paper towels. If the trap is hard to empty, you will stop emptying it, and then you will stop cooking.
Step six: Preheat properly and give it time. Cold steel sticks. Give the surface five to ten minutes to come up, and check it with a flick of water. If the water beads and dances, you are ready. If it just sits there, wait.
Step seven: Cook in order, hot to cool. Bacon first, then smash burgers, then vegetables, then eggs. Every batch leaves fat and flavor behind, and every batch after it tastes better. That is the rhythm of a diner flat top, and it works exactly the same on a portable one.
Step eight: Clean while it is hot. Scrape the surface down while it is still warm, push the debris into the trap, wipe with a thin film of oil, and walk away. Never shock a hot griddle with cold water. That is how you warp steel, and a warped surface is a lifetime of uneven burgers.
Step nine: The 60-day rule. Once a week, whether you cooked or not, wipe a thin coat of oil across the surface. Sixty days of that habit is the difference between a griddle that looks new in year three and a griddle with rust blooms in the corners. Everything rusts if you neglect it. The habit is the whole game.
What I left out of this setup
You do not need a griddle kit. Most kits are a scraper, a spatula, two squeeze bottles, and a set of cleaning pads, and you can put that together for less with better tools. Buy one good metal scraper, one long offset spatula, one squeeze bottle, and one pair of heat gloves. That is the entire kit.
You also do not need a cover for a griddle that lives outside, as long as you keep the surface oiled and the hood closed. Covers trap moisture as often as they keep it out, and a griddle sitting under a damp cover for a month is a griddle with a rust problem.
And skip anything marketed as nonstick in this category. Coatings wear out. Seasoned steel gets better.
What this all costs
The two pieces here sit at very different points on the budget. The two burner propane stove is the low-cost half, and it is the one I would buy first if I were building a setup in stages, because it works with any griddle top you already own. The 36-inch griddle with the built-in hood is the bigger investment, and it is the one that can replace a grill, a griddle, and a pile of accessories at once. Check current Amazon price on both before you decide, because those numbers move.
The math that matters is not the sticker. It is cost per cook. A setup you use three nights a week pays for itself in skipped takeout faster than any math I can write down, and a setup that sits under a tarp never pays for anything.
The short version
Heat source, surface, level ground, grease plan, seasoning habit. Build it in that order and you will cook on it three times a week without thinking about it. Skip the order and you will spend a season blaming the equipment.
That is the job. Get the setup right once, and the griddle turns you into the person everyone wants to cook at their house.